Quick Start
Follow the procedure described below to configure the ICE200
1. Connect the ICE200 and start AVR Studio as described in previous section.
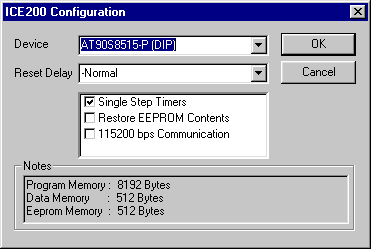
2. Open the object file. If the file is opened in AVR Studio for the first time, the Emulator Options automatically appears, see figure below. The red LED will now be turned off, indicating that the connection between the ICE200 and the host PC is established.

3. Set up desired configuration. A detailed description is found in the next sections, however the default settings are sufficient in most cases due to the automatic personality adapter detection.
4. Press the OK button.
5. The ICE200 is now ready for use!
![]() Tip!
Tip!
To change configuration for the current project, select the Option
- Emulator Options menu.
For advanced users, the Configuration Settings section describe in more detail the possible settings in the Option menu.
The software is now ready for use. Use the checklist below to ensure that the setup was done correctly. Then you can start the debugging!
![]() Tip!
Tip!
If AVR Studio cannot connect to the emulator, make sure no other programs
are using the serial port.
Checklist
1. The personality adapter selected corresponds to the device that
is to be used.
2. Target application is correctly connected to the emulator (as described
in previous section).
3. The AVR Studio detects that the emulator is present when opening
the application code.
4. The Options menu for ICE200 was shown when opening the source file
(only first time).
5. The device in the options menu correspond to the chip configuration
you want to use.
6. Emulator appears in the status bar to the AVR Studio found in the
window's lower right corner.
See Also