This example requires that you create a folder named "code" on your c: drive. In this folder you'll have to place the file named "8515def.inc" this file is the definition file for the AT90S8515, and contains definitions for the microcontroller needed by the compiler. This file is included in the Application Note AVR000.
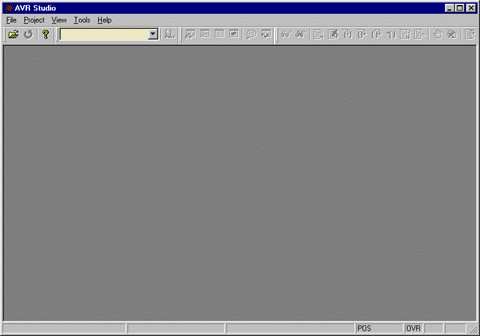
Start AVR Studio. It should start up looking something like this:

In this example we will make a simple program that increase the value of one of the PORT registers, making a binary counter.
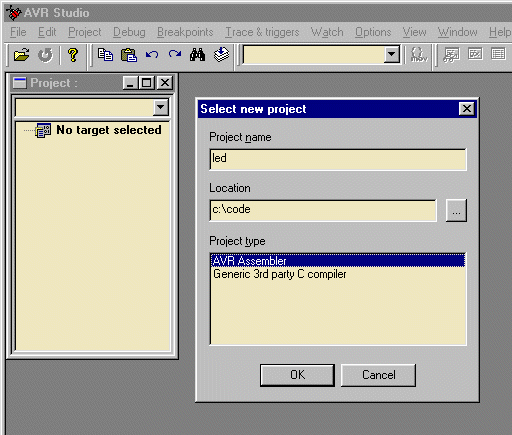
To create a new project, go to the “Project” menu and select “New”. The dialog box shown in the next figure appears. In this dialog box you should enter the project name. We choose the name led here, but this could of course be an arbitrary name.
Next you'll have to select project location. This is is the location where AVR Studio will store all files associated with the project. We have used the location "c:\code" as the directory. If the directory does not exist, AVR Studio will automatically create it without any further notification.
Now we have to select Project type:
Press the 'OK' button to continue.
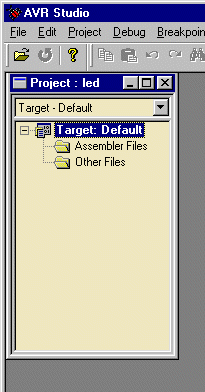
The Project manager will now appear and look as shown in the picture below. In this view, you'll see all files associated with your project. It will be empty at this point.
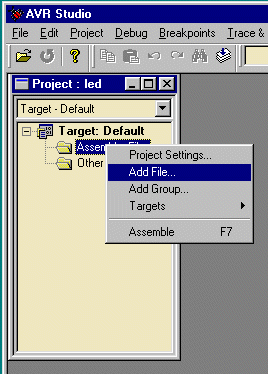
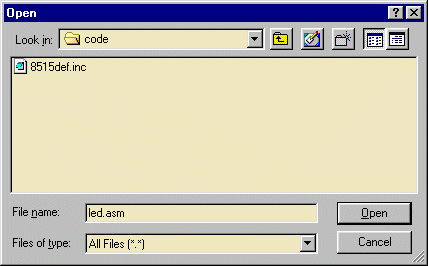
We now have to add an assembly file to the project. This can be done in two different ways, either by adding an existing assembly file, or by creating a new file. If you chose to create a new file, AVR Studio will create it automatically for you. As illustrated by the figures below this is how it is done: Add a new file by right clicking the "Assember Files" folder in the Project window and select "Add File". You will then get the "Open" dialog box. Navigate to the 'c:\code' folder and enter "led.asm" as filename. When you press "Open" the file will be created by AVR Studio and placed in the correct folder. Note that you'll have to manually enter the .asm extention for your file. If you wish to open an allready existing file, navigate to where it is placed and double-click on the file.
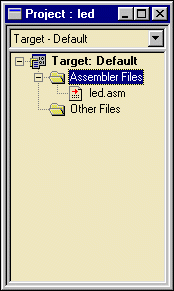
The file led.asm is now created by AVR Studio and placed in the Assembly files folder in the Project Window. It will automatically be marked as "Assembler Entry File". This indicates that the assembler will start with this file when assembling the project. The "Assembler Files" folder can only contain one file marked as entry file. The current entry-file is indicated by a red right-arrow on the file icon, all other files will be indicated with blue down-arrows.
We have now added a new but empty file to our project. The next step is to fill this file with our code. Open the "led.asm" file for edit by double-clicking on it in the project window. It will open in the built-in editor. The file is empty, and you'll have to manually enter the following code: (or you may Cut&Paste the code below directly into into the editor window..)
;******************************************************
.include "8515def.inc"
	rjmp RESET ;Reset Handle
;******************************************************

RESET:
.def temp =r16

	ldi temp,low(RAMEND)
	out SPL,temp
	ldi temp,high(RAMEND)
	out SPH,temp	;init Stack Pointer

	ser temp
	out DDRB,temp	;Set direction out
loop:
	out PORTB,temp
	inc temp
	rjmp loop
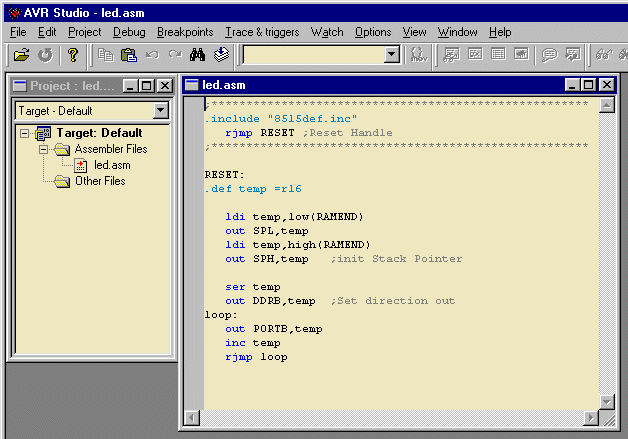
The editor window should now look something like the following picture:
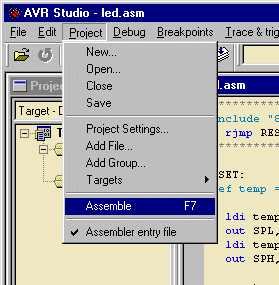
The next step now is to assemble the file. This is done by selecting "Assemble" from the "Project" menu, or by pressing "F7".
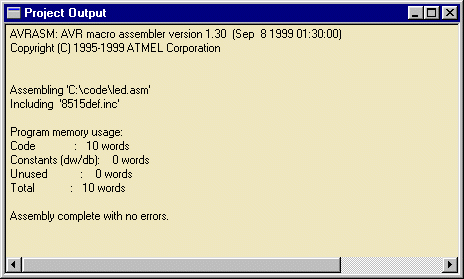
The "Project Output" window will now pop up, showing information from the assembler. From this window we can see that the code is 10 words (20 bytes), and assembly was completed with no errors.
We are now ready to advance to the next step, which is running the code in simulator mode.